Spell Component System
This sprint was focused mainly on creating the base spell class. This process was mainly bottle-necked by the sub components used for visual representation of the spell and how Unreal's component system deals with dynamically creating and destroying components.
More Minor Additions
Before I get into the main event, I'll take some time to explain the other, less ground-breaking, changes I made on Monday.
The first of these was the loading screen. I mentioned that in the last sprint I couldn't get the loading screen to recognise that a level had been loaded and speculated that it had to do with some change to the way the engine streamed levels. Actually though it was all due to an unset variable. You see, if you want the loading screen to be user dismissible then you have to set the "PlayTime" variable (which controls the minimum time to play the loading screen) to -1 instead of 0 like I had originally thought. Problem solved.
The next minor addition was a setting for overall quality, so the player doesn't have to fiddle around with individual anti-aliasing, texture quality, and view distance settings and can instead just choose and overall quality to use for the individual settings. This was also taken care of directly by the game user settings used for the rest of the settings.
Next up was a blueprint to C++ translation. I simply translated the default first person blueprint character to C++, mainly so that I could interface with it in the source instead of being restricted to blueprints only.
The final thing I added before I started on the spells was a player controller class. In many of my past projects we didn't need a custom player controller but I thought to broaden my horizons I would give it a shot. Player controllers are described by the engine developers as, "... the interface between the Pawn and the human player controlling it... essentially represent[ing] the human player's will". The documentation goes on to say that a player controller is usually only necessary in complex cases, and that for the most part a pawn can handle input. To be entirely honest I think this project would be in the latter camp, but there's no harm in doing it anyway to learn more about how the engine works. To start though, I rigged it up with some simple movement and look inputs.
The Spell Component
This spell component will be one of the core parts of this game so I had to make sure I got it right; which is partially why I spent four out of five days of the sprint on it. I chose to make it a component because it will be switched out on the player pawn, but the core functionality will need to be reusable. I started out with that core functionality, mainly timers and virtual methods.
I had a few goals for this component:
- It would need a cooldown between uses.
- There should be the option to keep firing (or repeat) while the player is holding down the use input.
- It should have the option to be charged up before firing .
- The repeating and charging options should be able to be used together, fining automatically when the charge is full to ready the next cast of the spell.
- The spell needs a visual representation in the form of a skeletal mesh, static mesh, and/or a particle effect.
Number 5 took the longest by far, but for now lets start with the non-visual aspects. Here is what I came up with:
SpellBase.h

SpellBase.cpp

First off, the cooldown. This is handled by the CooldownTimer and CooldownTime. Basically, every time the player tries to cast a spell, the TimerManager checks to see if CooldownTimer is still running, and if so it ignores the request to cast a spell.
Number two is governed by bDoesRepeat. If the spell repeats then when it has fired, it sets the cooldown timer but this time adds a callback to TryFire() when the timer elapses.
Number three, charging, is made possible by another timer and the MaxChargeTime variable. Essentially how it works is that instead of trying to fire when the player wants to cast a spell, it starts "charging" by starting a timer. At any point during the charge the player can then release the cast input which will fire the spell and the power of the spell can be calculated as time elapsed divided by MaxChargeTime.
Number four then only has one difference in that when the max charge is reached it will automatically fire and que up another shot.
The way this whole system is intended to be used then is that (like the comments say) StartSpellCast() and EndSpellCast() should be bound to pressed and released respectively. Then, for any specific functionality -- firing a projectile, changing a particle effect, changing a material, etc. -- the designer can override Charge(), ChargeFull(), or Fire() in blueprint as long as the parent function is called too.
Now for the visual stuff. I decided to make the meshes and particle effects subcomponents of the spell itself which is where most of my frustrations came from but I don't know what other way this could be done. The entire system boils down to having a pointer to each of the subcomponents and a variable to use for each one (as well as transforms and a material for the static mesh):

Then when the spell component gets created we simply create the appropriate components:

And when the spell gets destroyed we destroy the subcomponents: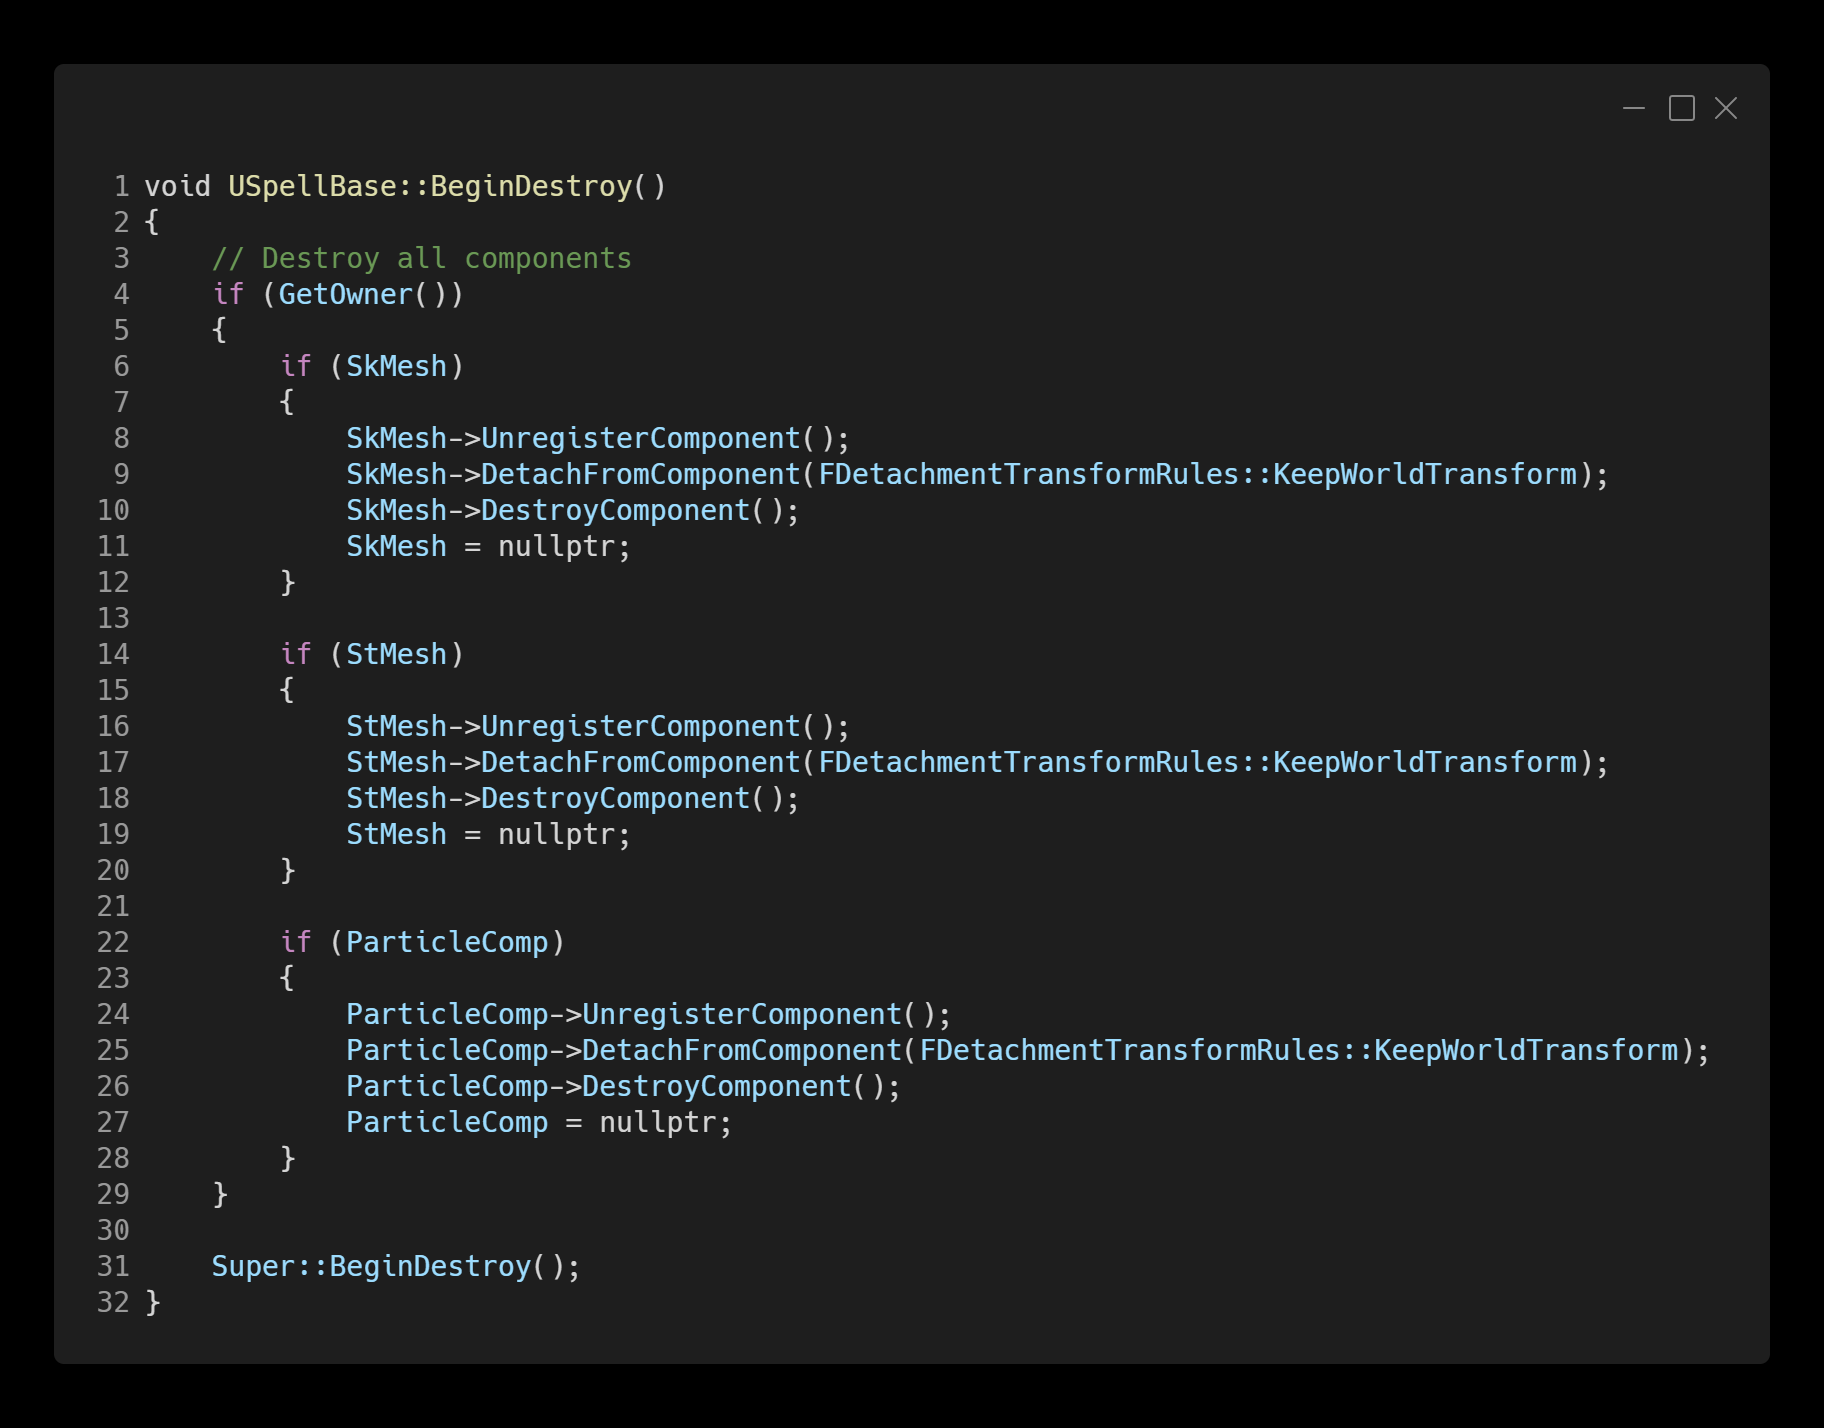
And in theory, that's it. Only, I wanted to be able to change these visual components in the editor and be able to immediately see the change in lieu of having a viewport in a component blueprint. This is where things got sticky. I implemented PostEditChangeProperty() but it really just did not want to play nice. At first, the changes would apply but noting would change visually, then things would change but only the first time you changed them, and then the editor started crashing when I compiled the blueprint but only if there was an instance of a spell in an open level!? I will cut out the rest of my ramblings and leave you with the thesis.
Many of thew problems had to do with the way unreal handles components; their lifecycle and their relationship to other components. Lets take a look at one of the methods for creating a component and see how it should be done.
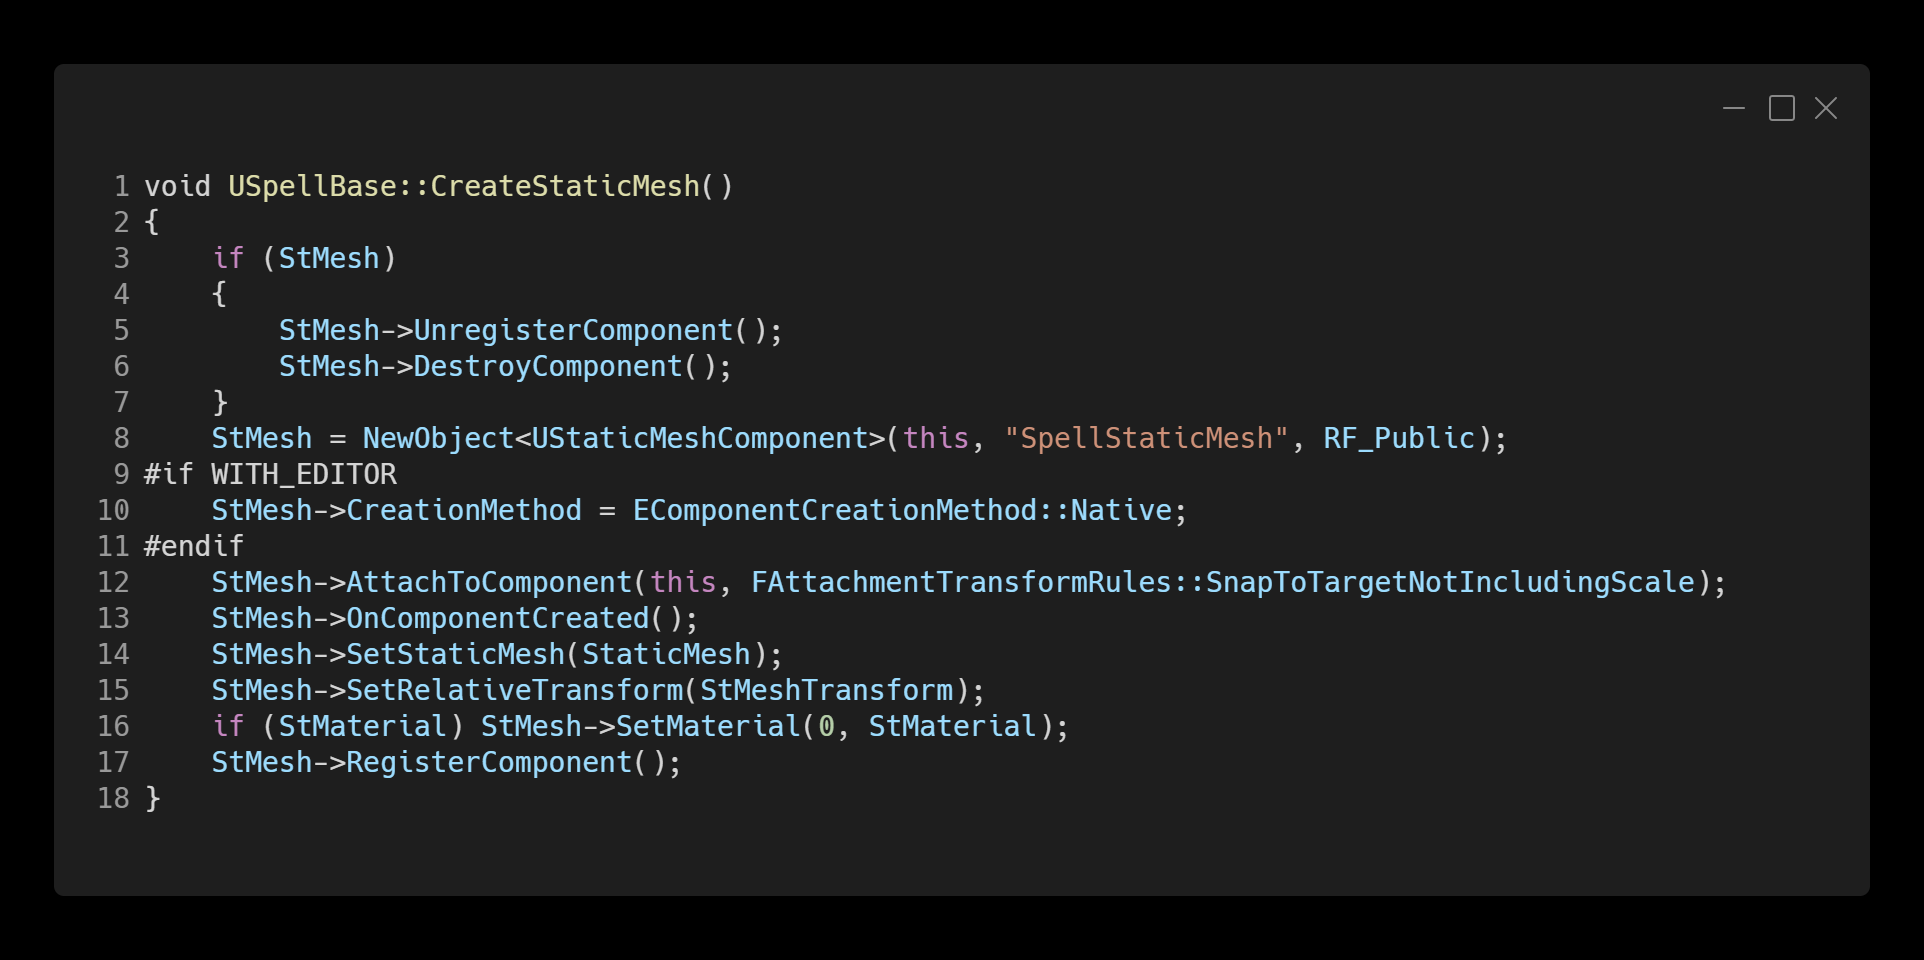
Firstly, if a component already exists we must remove it. Unregistering it is the first part of this process. Registration of a component is how the engine keeps track of which components should affect the scene. Once the component is destroyed we need to create a new one.
This new object needs to have a unique name and the RF_Public flag. This flag tells the engine not to garbage collect it as it is probably still referenced. It has to be RF_Public and not RF_Standalone though as for some reason the engine straight up crashes if you use RF_Standalone and I couldn't tell you why.
Next, in the editor we set the creation method to Native. this means that it shows up as an inherited component and cannot be accidently deleted by a developer in the editor. We can then attach the component to the spell. This just ensures that the subcomponent follows the same transform (not including scale) as the parent.
Then we call OnComponentCreated(). To my knowledge this initializes the rest of the component. Before I added it was the point where I could change the meshes but there was no visual representation (e.g. a rendered mesh) in the scene.
Then from there we can do anything specific to the component such as setting a material or particle asset. After all of that is done you can change any component's values and the engine doesn't crash!


Comments
Post a Comment