Progress Update #1
Major Progress
After another long break, I have returned and in the meantime I have made quite a bit of progress. I fixed the issues from last blog entry, made some more problems to fix later, added stars (and with that a new lighting system), and added ocean depth just to name a few.
Fixing Past Issues:
This was much easier than I thought. The main issue was that the biomes were generating across the wrong poles of the planet. This was fixed by changing PointOnUnitSphere.X to PointOnUnitSphere.Z. I also fixed some 'array out of bounds' error that was preventing the planet from generating, but to be honest I forgot where I made that change it was so long ago (and probably as small of a change as changing that x to z).
Stars:
I knew I wanted more celestial objects at some point, and I was getting quite tired of dealing with the stupid biomes not working so I decided to pivot to making a star texture. I knew all I needed was a texture because the geometry of the stars could just be spheres, and the rest of the interaction was already handled by the celestial body base class.
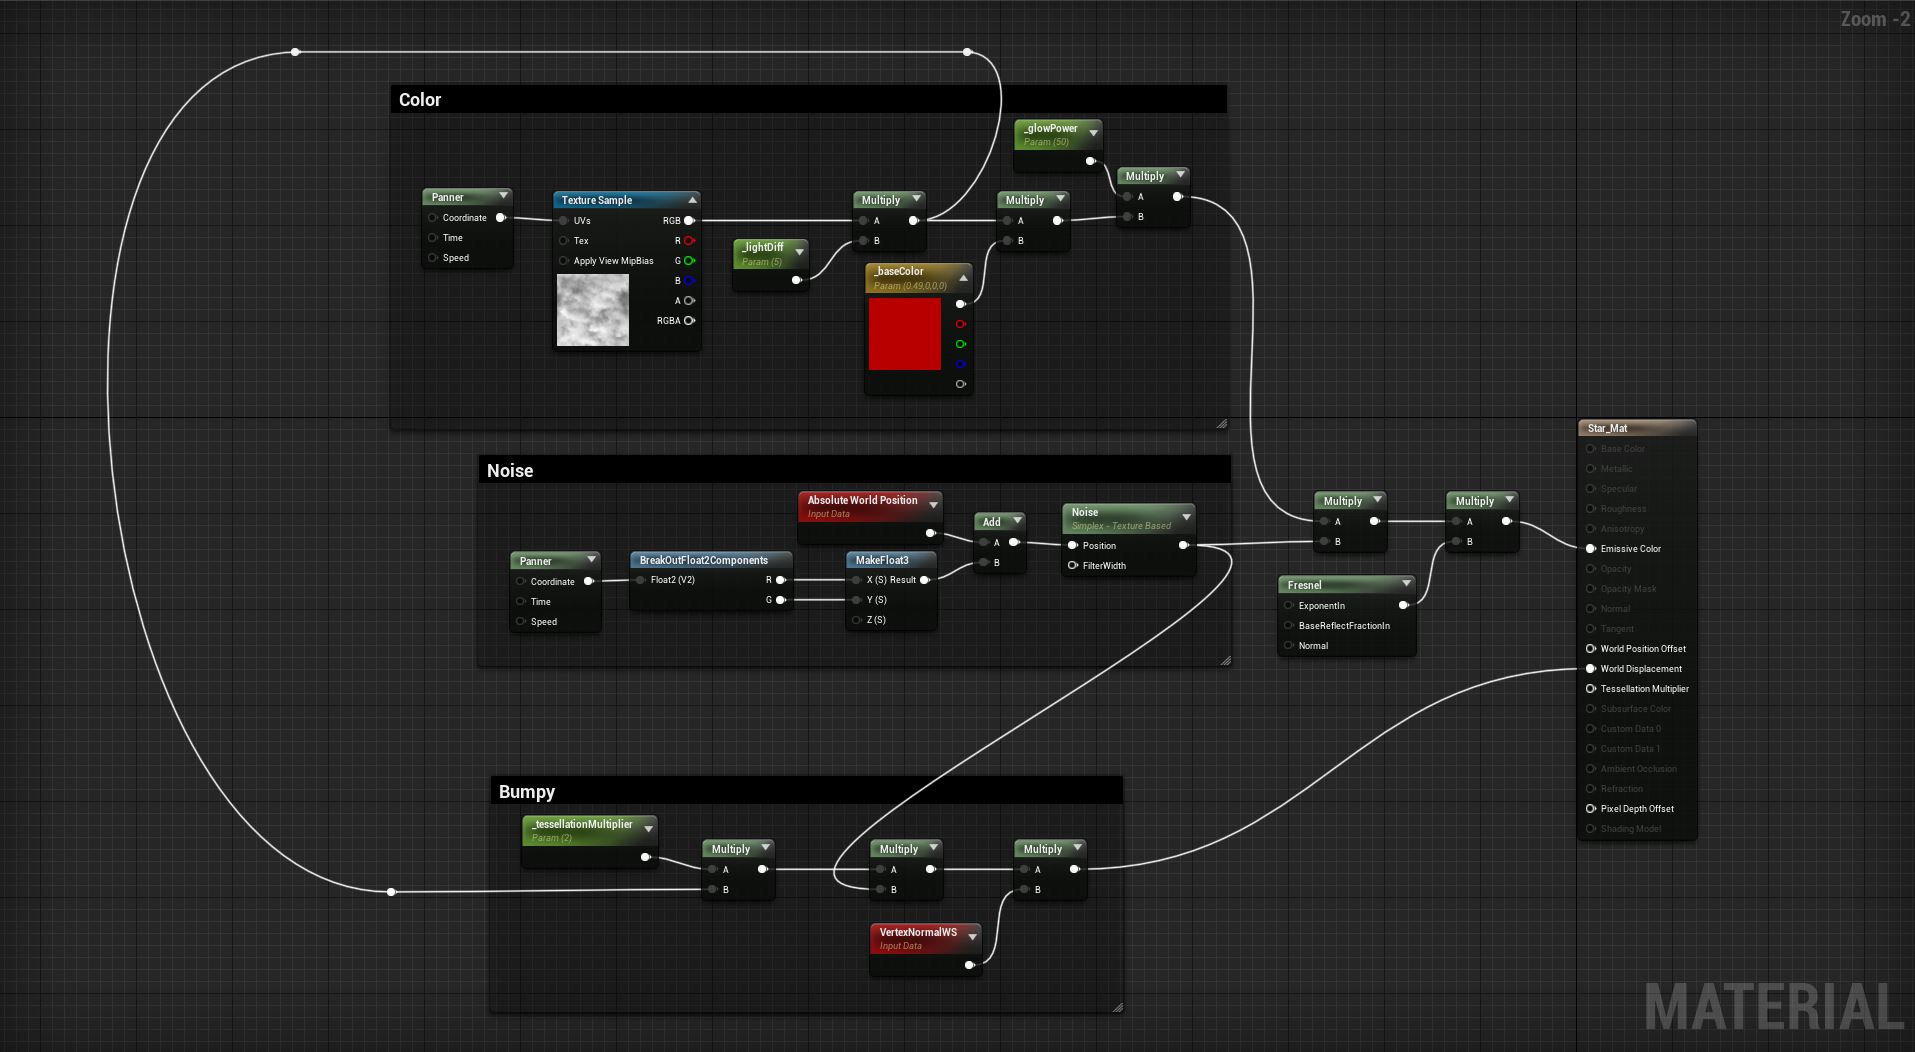
I started looking around online for a tutorial because I knew the basic ideas (noise, some way to pan the noise, emissive texture, color gradients, etc.) but I didn't know much of how to put it all together. I found this great video on the matter that answered all my questions and even introduced me to some things I didn't even know existed.
One of the new things that blew my mind was the 'Panner' node. It was so easy to get a nice smooth movement of the noise I didn't expect it! One of the other things that I didn't know about was the 'Fresnel' node. Apparently the math it does is based on lighthouse lenses, of which a guy named Fresnel is famous for inventing. But in Unreal it gives more glow around the edge of the star than in the center, which I didn't know I needed until I saw it. Another thing I didn't know I could do was displace the shader in the world through the 'World Displacement' input. As I understand it, this is a faster way of making the mesh look distorted without actually computing the changes for collision and stuff.
This is the final graph I came up with:
And this is what it looks like in the scene:
If you look carefully at the shader graph, you might notice that the noise output has the subtext 'Simplex - Texture Based'. This is because I finally bit the bullet and installed the SimplexNoise plugin. Although I want to do as much as I can in this project myself with only base Unreal, this plugin is just so useful for so many things; one of which was getting noise into a texture. Because I added it now and not at the beginning of the project though, that will mean that I will want to eventually go back and replace Unreal's built-in noise generator with the superior SimplexNoise implementation.
New Lighting System:
I didn't expect needing to do this, and it was a pain in the ass, but the result I think is really cool and worth the effort. The necessity for a new lighting system came from the fact that now there was a "light source" (stars) it made sense for the planets to be illuminated by it.
My first inclination to make this work was to just increase the emissive property on the star until the planet was lit up. Unbeknownst to me, the emissive property of a texture in Unreal is a lie and doesn't actually produce dynamic lighting in the scene, only to the camera. Well there was the option to bake the lighting manually but that wouldn't be dynamic and would take away the whole point of making a real-time game. I also considered the possibility of faking the lighting with other Unreal tools. Just spawn a directional light for each object that needed to be illuminated, in the direction of the sun, and pointed at the planet. I actually started work on this approach before finding another way to fake it and going with that.
This was to make the planet texture emissive as well, but only emit the texture of the planet on the side that is facing the sun (credit to this video for showing me this solution). This approach is good in that there are lots of parameters I can tweak to get just the right look I want, but also introduces problems such as what to do if there are multiple light sources.
With some minor manipulation I was able to adapt the graph from the video to work for my purposes. The only problem was that when I ran the game, the planet was being illuminated from the bottom, no matter where it was in relation to the sun.
After some time I realized that the world-space pixel normal node was getting the wrong data. When I was making the procedural meshes, when asked for normals I had passed through an empty array. After a small panic thinking that I would have to write the calculations for pixel normals myself, I found in the Unreal documentation a page on CalculateTangentsForMesh(). This function will, "Automatically generate normals and tangent vectors for a mesh". This function was my saviour and I am so glad that it exists.
When I used it though, it gave me the result I wanted, but at the expense of a full 15 seconds. Taking that long every time I want to regenerate the terrain is unacceptable and in the future I will have to figure out what takes so long and how I can reduce that time (parallelization maybe?). This is a problem I have been dealing with for a while, that some things (notably saving the scene and generating terrain) take longer than I would like them to. Optimizations will have to be made, the biggest of which I think will be in the way that the planet data is stored. Right now I have no idea where the vertices, triangles, and stuff are stored; my only guess would be somewhere in the intermediate folder. With no knowledge on the subject, I think if the planet data is stored in a data table then read back, that would be faster. But that will come in the future.
Here's the shader graph:
And here's what it looks like in action:
Ocean Depth:
For all of the things that I have been working on and talked about in this blog entry, I have been doing so without the help of Sebastian Lague's tutorial series. When I had completed all this though, I looked back at it to see if there was anything else I missed that would improve my game. I found that I had one unwatched video about ocean depth.
When I did watch the video through I thought two things, "Wow, that really does improve the look of the planet," and, "It can't be that hard". Surprisingly enough, the second statement didn't underestimate the difficulty of the task this time!
The only modification I had to make to the tutorial was to make a seperate texture for the ocean and for the land, where the tutorial had both parts on the same texture. It was while doing this that I found I had many CurveLinearColors and CurveLinearColorAtlases for just one planet. In the future I know that I will have to find some way to instance them but for now manually creating them works fine.
Here's the graph (only the daytime texture changed):
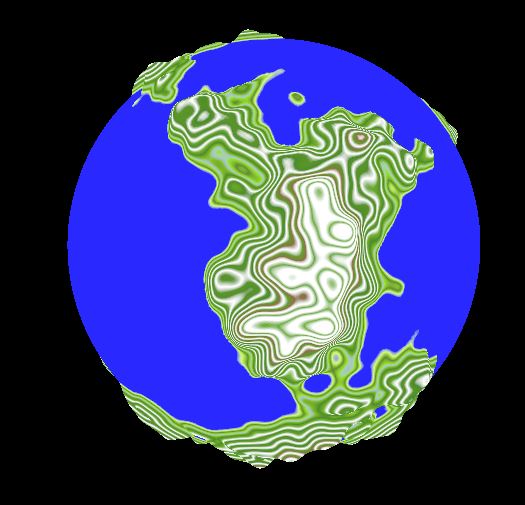
And here's the final result:
 |
| (The hard biome edges will be fixed soon) |
Closing:
I haven't been posting a lot due to getting settled in to college, but now I am hoping to get at least one progress update a week. Additionally I aim to get a "playable game" by the end of the semester. This goal will be helped by the winter break being extended due to COVID-19.
Sebastian Lague posted another video recently where he one-ups my game again by having a realistically rendered atmosphere. It looks super cool and I think I want to do something similar in my game. However, if I do create atmospheres they will be much less realistic than Sebastian's.


Comments
Post a Comment